Part 2: Creating the Layout


What you will get from this workshop
- A thorough introduction into the world of website development with HTML and CSS
- Learn how to code your first website, a journal!
- A list of resources to help you in your programming journey
Tutorial Content
- Creating the layout of the website with HTML
- Customizing the layout with CSS
- HTML/CSS: Coding the navigation
- Next Steps
Creating the layout of the website with HTML
Now that we have introduced HTML and CSS in our previous workshop, we can begin coding your first project!
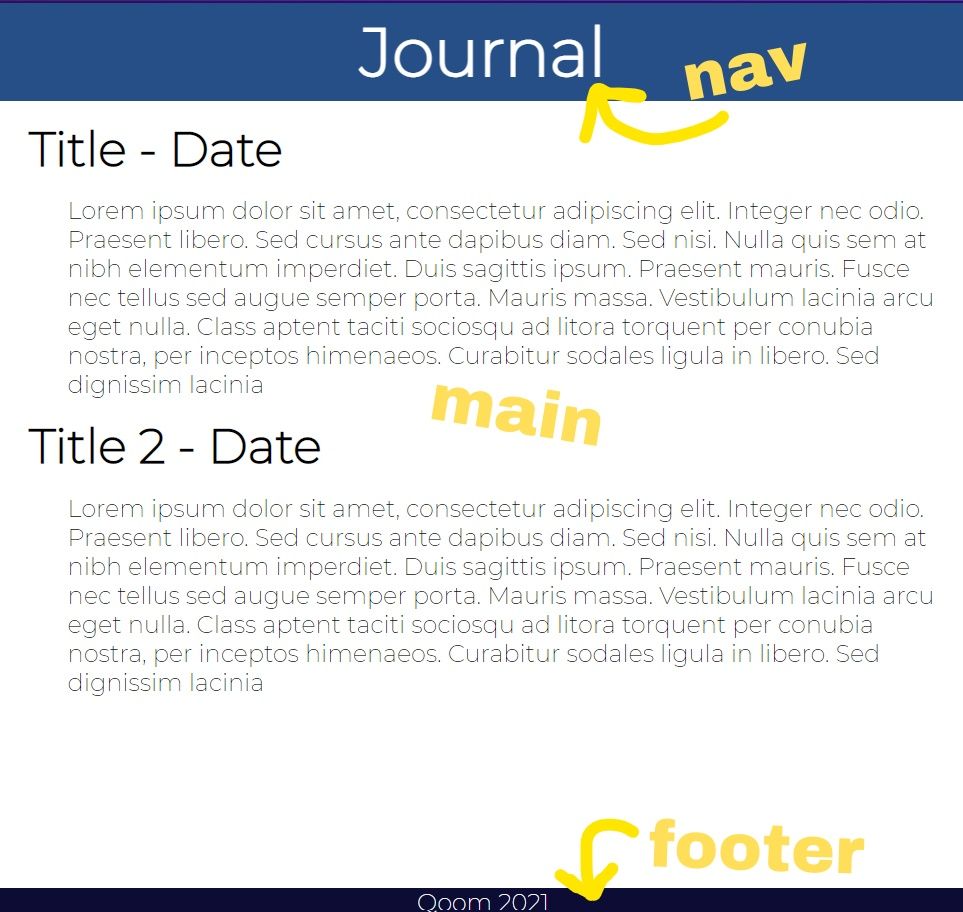
Our first step to creating your journal web page is to create the HTML skeleton. Have you noticed that most websites have the same layout?
- navigation bar with the logo, title, and links to other pages
- main section with the focus and content of the page
- and a footer with copyright and attributions
The journal will follow that format.
So head over to Qoom.io and log in to your account. Then click over to your coding space and create your first project with New Project!
To code the navigation, main section, and the footer put those elements after the <body> tag in your index.html file.
<body>
    <nav></nav>
    <main></main>
    <footer></footer>
</body>
Tabbing and spacing of elements inside other elements is not important for the code, but is a common way to visualize for you, as the programmer, the inheritance.
Congrats 🎉! You have written your first line of code and completed the layout of the website!
Customizing the layout with CSS
Remember that CSS requires different syntax compared to HTML, but do not worry we will walk through and explain each line .
First, we will write a CSS reset, which is setting the default style for all the elements.
@import url('https://fonts.googleapis.com/css2?family=Montserrat:wght@300&display=swap');

* {
	padding: 0;
	margin: 0;
	font-family: 'Montserrat', sans-serif;
}
The * is the universal selector to select all of the elements.
And since font-family is calling 'Montserrat', we need a way to tell the computer where to get the font family from. So that is what the first line with @import url... is doing.
The property padding dictates how much space is between the content and it's borders - so think internal spacing.
And the margin property sets the spacing outside of an element or content - so think external spacing.
HTML/CSS: Coding the navigation
First, we can code the navigation bar of the journal in HTML. We want to be able to let the user know what the title and the beginning context of this website.
So within the navigation element, let's put "Journal" as the title.
<nav>
    <h1>Journal</h1>
</nav>
As you are getting familiar with HTML, you were probably able to guess that the "Journal" title goes in between the navigation tags.
<h1> is the HTML tag for a header, which is just a default large text.
Next, we will style the navigation.
nav {
	padding-top: 20px;
	padding-bottom: 20px;
	text-align: center;
	background: #274f87;
	color: white;
	font-size: 30px;
}
Let's break down this declaration block!
We already know what padding is, and the px after the 20 value is shorthand for pixel. And pixels are a unit to measure the screen, so we want the content inside the nav bar to be 20 pixels away from the border.
And the value for the background property is a hexadecimal (hex) value! Basically, a way to measure color.
The color property is for the color of the font, or text within the element.
Next Steps
And here is what your html file should like:
<!DOCTYPE html>
<html>
  <head>
    <link rel="stylesheet" href="styles.css">
      <script type="module" src="script.js"></script>
  </head>
  <body>
    <nav>
      <h1>Journal</h1>
    </nav>
    <main>
    </main>
    <footer>
    </footer>
  </body>
</html>
And here is what your CSS file should look like:
@import url('https://fonts.googleapis.com/css2?family=Montserrat:wght@300&display=swap');

* {
    padding: 0;
    margin: 0;
    font-family: 'Montserrat', sans-serif;
}

nav {
    padding-top: 20px;
    padding-bottom: 20px;
    text-align: center;
    background: #274f87;
    color: white;
    font-size: 30px;
}
Now that we have the layout of the website, in the next tutorial we will cover the footer and writing the journal entries. Follow our next tutorial here!
tutorials.qoom.io/your-first-website-development-project-part-3